A roast typically tends to be a piece of meat that has very little fat or marbling. This is especially true of chevon (goat) or venison, but can be true of beef as well. Marbling is typically what keeps a piece of meat moist and juicy while it is cooking. So since these cuts that are used as roasts don't have much of that they can be dry and chewy. Nobody I know likes dry and chewy. So here are my roast cooking tips for meat that is moist and literally fall off the bone or falls apart.
1. Cook the meat at a lower temperature for a longer period of time. I typically cook my roasts at 250 degrees for about 4-5 hours depending on size of the roast.
2. Keep the roast moist by placing it in a pan with a little bit of broth or water in the pan. Then cover the roast to seal in the moisture. Keep the roast covered until the last 30-45 minutes of cooking. Just enough to brown the outside of the roast.
3. You can use a crockpot to cook a roast, but keep the temperature on low and cook for about 8 hours.
4. Don't try to cook a roast like other meat as it will be dry and tough. Cooking a roast takes planning on your part don't try to rush to process.
That is it. Simply season the meat like you wish and cook it low and slow with moisture and you will have fall off the bone tender delicious roast. Blessings, Kat
Monday, January 30, 2012
Sunday, January 29, 2012
How To Make a Rich Homemade Broth
I have been making a good bit of broth lately since I drink so much of it. So since I have been making it I thought it would be good to share with my readers on how to make a really rich bone broth. Bone broth is great for adding lots of micronutrients to your diet. It is also a great pick me up on a cold day or even after a hard days work. For me it is a great start to my day. For loads of information on the health benefits of bone broths you can check out the Weston Price Foundation website. Here is how I make my broths.
Take a large stock pot and fill it 1/2 to 3/4 of the way with cold water. Then add your bones. If I am doing a beef or venison broth then I roast the bones for about 15 minutes in a 400 degree oven. Just to brown them a bit. This gives a nice rich color and flavor to the broth. After adding the bones I add about a cup and a half of apple cider vinegar. The vinegar will pull calcium from the bones into your broth. I let that sit for a couple of hours then I place on the stove and slowly bring it to a simmer. You don't really want a rolling boil, just a very slow simmer will do nicely. After it has been simmering for about 2-3 hours, I add a couple of carrots chopped up, a stalk of celery chopped up and an onion along with salt and pepper. These things deepen the flavor of the broth. Then it simmers some more. For beef, venison and pork I let the broth simmer for about 8 hours after adding the veggies. For turkey, chicken or rabbit I let the broth simmer for about 4-6 hours after adding the vegetables. The next step is to remove all the veggies bits, bone bits and meat bits from the broth. Let it cool then place it in the refrigerator overnight. The fat will congeal at the top after this and can easily be scooped off. This is a personal preference, I like my broth to be clear. You can leave it and jar it up right away if you don't mind the fat. After getting rid of the fat then heat the broth back up on the stove, jar it up and can at 10 lbs. of pressure for 20 minutes for quarts and 15 minutes for pints. That is all there is to it and you can drink it by itself, use it in soups and casseroles or even cook your rice and pasta in it. Broth is such a wonderful addition to the pantry and your diet. Blessings, Kat
Take a large stock pot and fill it 1/2 to 3/4 of the way with cold water. Then add your bones. If I am doing a beef or venison broth then I roast the bones for about 15 minutes in a 400 degree oven. Just to brown them a bit. This gives a nice rich color and flavor to the broth. After adding the bones I add about a cup and a half of apple cider vinegar. The vinegar will pull calcium from the bones into your broth. I let that sit for a couple of hours then I place on the stove and slowly bring it to a simmer. You don't really want a rolling boil, just a very slow simmer will do nicely. After it has been simmering for about 2-3 hours, I add a couple of carrots chopped up, a stalk of celery chopped up and an onion along with salt and pepper. These things deepen the flavor of the broth. Then it simmers some more. For beef, venison and pork I let the broth simmer for about 8 hours after adding the veggies. For turkey, chicken or rabbit I let the broth simmer for about 4-6 hours after adding the vegetables. The next step is to remove all the veggies bits, bone bits and meat bits from the broth. Let it cool then place it in the refrigerator overnight. The fat will congeal at the top after this and can easily be scooped off. This is a personal preference, I like my broth to be clear. You can leave it and jar it up right away if you don't mind the fat. After getting rid of the fat then heat the broth back up on the stove, jar it up and can at 10 lbs. of pressure for 20 minutes for quarts and 15 minutes for pints. That is all there is to it and you can drink it by itself, use it in soups and casseroles or even cook your rice and pasta in it. Broth is such a wonderful addition to the pantry and your diet. Blessings, Kat
Friday, January 27, 2012
Rabbit Colony 4
Well another day's work on the rabbit colony. I am so excited that we are so close to being done. Looks like the rabbits will be able to move into their new digs within the week.
Here is the half wall that separates the actual colony from the feed area.

Here is the half wall from the inside of the colony itself.

Here is the outside door that opens into the feed area. This is from inside the colony.

I had another picture of the outside of the door that opens into the feed area. We still need to put up the gate into the colony itself and trim some of the conveyor belt and put up a few new pieces. So a little more work and we will be done. Again I am so excited to get these rabbits out of their cages. Blessings, Kat
Here is the half wall that separates the actual colony from the feed area.

Here is the half wall from the inside of the colony itself.
Here is the outside door that opens into the feed area. This is from inside the colony.

I had another picture of the outside of the door that opens into the feed area. We still need to put up the gate into the colony itself and trim some of the conveyor belt and put up a few new pieces. So a little more work and we will be done. Again I am so excited to get these rabbits out of their cages. Blessings, Kat
Thursday, January 26, 2012
The Legacy
I got to thinking the other day about all the things that I recall on a daily basis that I have gleaned from family elders over the years. Thinking about that got me to thinking about what I am leaving behind for my children and grandchildren. In other words what legacy am I giving them. I am not talking about material things for those things are temporary and life has a way of taking them away. The legacy I am talking about is what am I giving them that can never go away for as long as they choose to hold on to it. So here are the things that I pray that I am leaving my children with as their legacy.
Faith- I pray everyday that I am teaching and showing my children that God and His abundance is glorious and everlasting. I pray that they understand that His graciousness and courage can get them through any of the trials and tribulations that life brings. I hope that they learn from me that true peace only comes from the love of Jesus Christ.
Love- I pray that I am leaving teaching my children that they are loved and how to love unconditionally. There is such joy in loving someone else, just as there is such joy in being loved. Saying I love you is a big deal in our house and is done on a regular basis. I pray that my girls never forget how much and how deeply I love them.
Tenacity- I pray that my girls learn how to be tenacious. To go after their dreams and not to ever let anyone else tell them they can't do something.
Wisdom- I know much of this comes with age, but the more I think about it..it is age that gives us the clarity to understand the wisdom that came from those before us. I pray that my children gain this clarity to see and understand the wisdom that they are being given.
Skills- I pray that my children always know how to take care of their basic needs. That if time gets tough they can grow a garden and raise some rabbits for meat. I pray that they learn the skills of cooking good wholesome foods and making ends meet. I pray that they learn how to survive and thrive no matter what life throws at them.
Education- I pray that my children never stop in their desire to learn and that they develop a love for knowledge. No matter how old you are or how many years they have been away from formal "education" there is always something to learn. I pray that they understand that sometimes it is fun to learn something just to see if you can.
This is the legacy that I want my children to treasure and hold on to. Material things pass away if they were ever there to begin with. I know in my own family history wealth and land have been had and lost time and again. Many times my ancestors started over with very very little. However, the legacy can't be lost and can't be taken away. It is something that will stay with them as long as they choose to hold it dear. I pray that they do and I pray that I pass it on to them. Have you ever thought about what legacy you are leaving behind? Blessings, Kat
Tuesday, January 24, 2012
Weston Price and Fibro/Chronic Fatigue
Ever since my mom was in the hospital in September life has been pretty hectic for me with no slow down much at all. I am now needed by her more than I have been in the past along with Petunia's active social and school life, and this takes me away from my duties here at the farm more than it used to. That typically means that I am always trying to play catch-up when I am home. For someone with chronic fatigue and fibromyalgia that can be pretty tough. So, I really needed to sit down and take a hard look at things. One thing that got me to thinking was the time years ago that I was on the Atkins diet. I felt really good while I was on that diet. I lost weight and seemed to have a good amount of energy. I felt as close to normal as I am ever going to feel. So I really sat down and took some time to read through the health articles at the Weston Price foundation. I realized that even though we eat pretty well and pretty healthy there were still many things going on with me and my diet personally that certainly were not helping with my pain levels and my fatigue. The first thing I noticed was my breakfast usually consisted of muffins or toast with some fruit. First not many calories and the majority of those calories were carbs. For someone with fibro carbs are inflammatory, in other words they cause pain and inflammation. Second, for someone with chronic fatigue the last thing that we need is the down swing in blood sugar that comes from eating lots of carbs. Also, the calories really weren't enough for the amount of work that I needed to do which is pretty physically exerting. So by the time dinner (lunch) came around I was already pretty done for. Then since I usually serve some type of bread with dinner sometimes dinner would leave me with the carb up and down syndrome again and by 1:00 I could hardly keep my eyes open much less be productive. One of the things with my chronic fatigue also is that I am rarely hungry and so when I do sit down and eat I don't eat a lot because frankly it is just too much effort and I am too tired. So again, a physically exertive day with not enough productive calories. Then by supper time I just want something easy. Many times that something easy is fruit and a peanut butter and jelly sandwich or heated up leftovers from dinner. So reading through the Weston Price material really gave me a lot to think about. I first realized that I was not getting enough calories in the form of fat and protein to give me any lasting energy. Second, the carbs were killing me in the form of pain and the downswing after eating a lot of carbs really did not help my afternoon fatigue. So I have made some changes. I forgo the fruit and heavy carbs in the morning and opt for loads of protein and healthy fats. Typically for breakfast I will have a good sized glass of milk (raw full fat milk), two tablespoons of coconut milk, meat left over from the day before and two eggs and a cup of homemade broth. For dinner, I eat what I cook for the whole family but I leave off any bread that we may have. For supper I allow myself to have more carbs and some fruit since I will be going to bed and just sitting around. Last night I had a blackened flounder sandwich on whole wheat bread, some peaches and some roasted pecans. I have only been working on this nutrition thing for a couple of weeks, but I have noticed a difference. My crashes are less, I have a little more energy and when I don't follow my regime I feel lousy. I still have pain and I still get a little tired during the day, but it isn't the bone weary can't put one foot in front of the other tired. The pain is bearable, not the bring tears to my eyes kind of pain. I am hoping that as long as I stick to what my body needs and doesn't need nutritionally that I will see even more improvement. I am going to try baking sourdough bread and sprouted grain bread to see if that helps also. Supposedly it is the phytic acids in the grain that causes issues and sprouting and fermenting are supposed to de-activate those phytic acids. We will see. All I can say is that nutrition really plays a huge role in our health and how we feel. So sometimes instead of just living with whatever is ailing us then we simply need to take a real hard look at how and what we are eating. I am doing that now and I am beginning to feel more human. Blessings from the farm, Kat
Saturday, January 21, 2012
Tightwad Tips- Saving a Little at a Time
Many years ago I learned a neat little trick for saving money and it really required so little effort and I never missed the money. I started saving my change instead of spending it. For instance, if I bought something that was say 50 cents and paid for it with a dollar bill, the 50 cents change went into my savings jar. Over time that built up quite a lot. We paid off some credit card bills doing this very thing and never missed the money in our budget. Another twist to this trick is to write down a whole dollar amount in your checkbook when you write a check. For instance, if you write a check for 10.15 then round up and write down 11.00. You have then saved 85 cents without really even missing it. Doing this does take some getting used to when it comes to balancing your checkbook, but eventually you learn to ignore the extra in your account. To give a really good example of how much the change in the jar can add up, I will tell you about some friends of ours. For a couple of years they had been putting all their change in jars. Then they decided that they wanted to take the family on vacation so they pulled out all the change jars. After it was all added up they had enough cash to completely pay for the vacation. Folks, they had saved close to a couple thousand dollars in change! They had a nice vacation and didn't have to worry about it putting a strain on their budget. A little really can go a long way when you are diligent. Blessings, Kat
Thursday, January 12, 2012
Rabbit Colony 3
Well, we had a really productive day in working on the rabbit colony. Our friend Cherelle came over and gave us a hand. Many, many thanks for all her hard work! Here are the pallets that are being used as the base for the bottom wall that are nailed up and in place.

Then we framed in the doorway that will lead to the feed area of the rabbitry.

Next we began tacking conveyor belt (thanks to another friend, Jen, and her husband). This stuff is really heavy duty rubber and will make the walls easy to keep clean and also there is no critter that is coming through those walls now.

Here we all are tacking up more conveyor belt along the back wall. That's my short little fluffy self in the green jacket. Hubby is too tall to stand up straight in the space so he has to bend over a lot. The little one in the front was a great little helper!

Almost done with the conveyor belt.

Then we put screen up along the outside to keep flies out of the rabbitry. Wire is going to be put on the outside to keep critters from trying to get through the screen, which wouldn't be that hard.

That is about it. I think we made great progress for the day. Won't take much more and then we can start to think about moving the rabbits in! Blessings, Kat
Tuesday, January 10, 2012
Flying with Flylady
Several years ago I discovered Flylady and her system of home management and building housekeeping habits made a huge difference in my life. I still use many of those habits and basic ideas in my homekeeping. I was talking to a friend the other day about how sometimes it is so difficult to keep up with everything that must be done and I brought up Flylady to her. I told her what a huge difference it had made for me. Later as I thought about our conversation I thought about how I have slacked in many of the habits and that I was once again beginning to feel overwhelmed also. Hmmmm....I had given up getting dressed before I came out for my coffee in the morning. I had also gotten out of the habit of leaving my kitchen shiny at night many nights. So I made the decision to follow my own advice and yesterday once again started the habits that I learned following Flylady's babysteps. I must say I felt a huge difference yesterday as I developed my morning routine and then again as I implemented my evening routine. Despite the fact that I had chores to do around the farm and had to take my mom to the dentist and town yesterday afternoon I managed to put out two hotspots and the kitchen was shiny before I went to bed. I am already dressed for the days chores today. When I got home from town yesterday afternoon I did not feel like I was walking into a nightmare. Believe it or not, just the simple act of getting dressed and brushing my hair before I came out of the bedroom for coffee meant that I was ready to tackle the day earlier. I had gotten to where it was harder and harder to get motivated to get up in the mornings and get dressed to start the day off. So if you are feeling overwhelmed I highly recommend Flylady for getting your home under control and bringing peace in your life. Even though I don't really do the home journal anymore because it became overwhelming trying to add all the farm stuff into the journals, the babysteps alone and identifying and tackling hot spots makes a huge difference. You can see my old journals here on the blog, I think they are under home organization. I know it made a difference in my life once and is already starting to make a difference in my life again. So thanks to my friend I am once again back in control. Blessings from the farm, Kat
Saturday, January 7, 2012
12 Months, 12 Goals
We tend to do a lot of thinking during the winter about what we can do that we haven't done and what didn't work and can be re-done to work better and just general things that we would like to accomplish around the farm. We don't always accomplish all that we would like to do each year. Some things take more time to do, some things are a little more costly and must hold off, and some things we just don't get around to. That is farm life. This year we have 12 goals...one for each month. We'll see how we do by the end of the year. So here they are:
1. Build the rabbit colony
2. Raise the garden fence to keep chickens from going over.
3. Build shelter for next year's pigs
4. Move and organize the tool shop
5. Build a smokehouse
6. Cross fence the large pasture
7. Re-fence the property fence along the back of the property
8. Re-fence one section of what was the pig pasture
9.Clean up dead trees in the front pasture
10. Re-roof the old shed and turn it into a processing area
11. Paint the studio
12. Get a new gate for the big pasture
Well, those are our goals anyway. We will just have to see what we can accomplish. What are your goals for the year? Blessings, Kat
Rabbit Colony 2
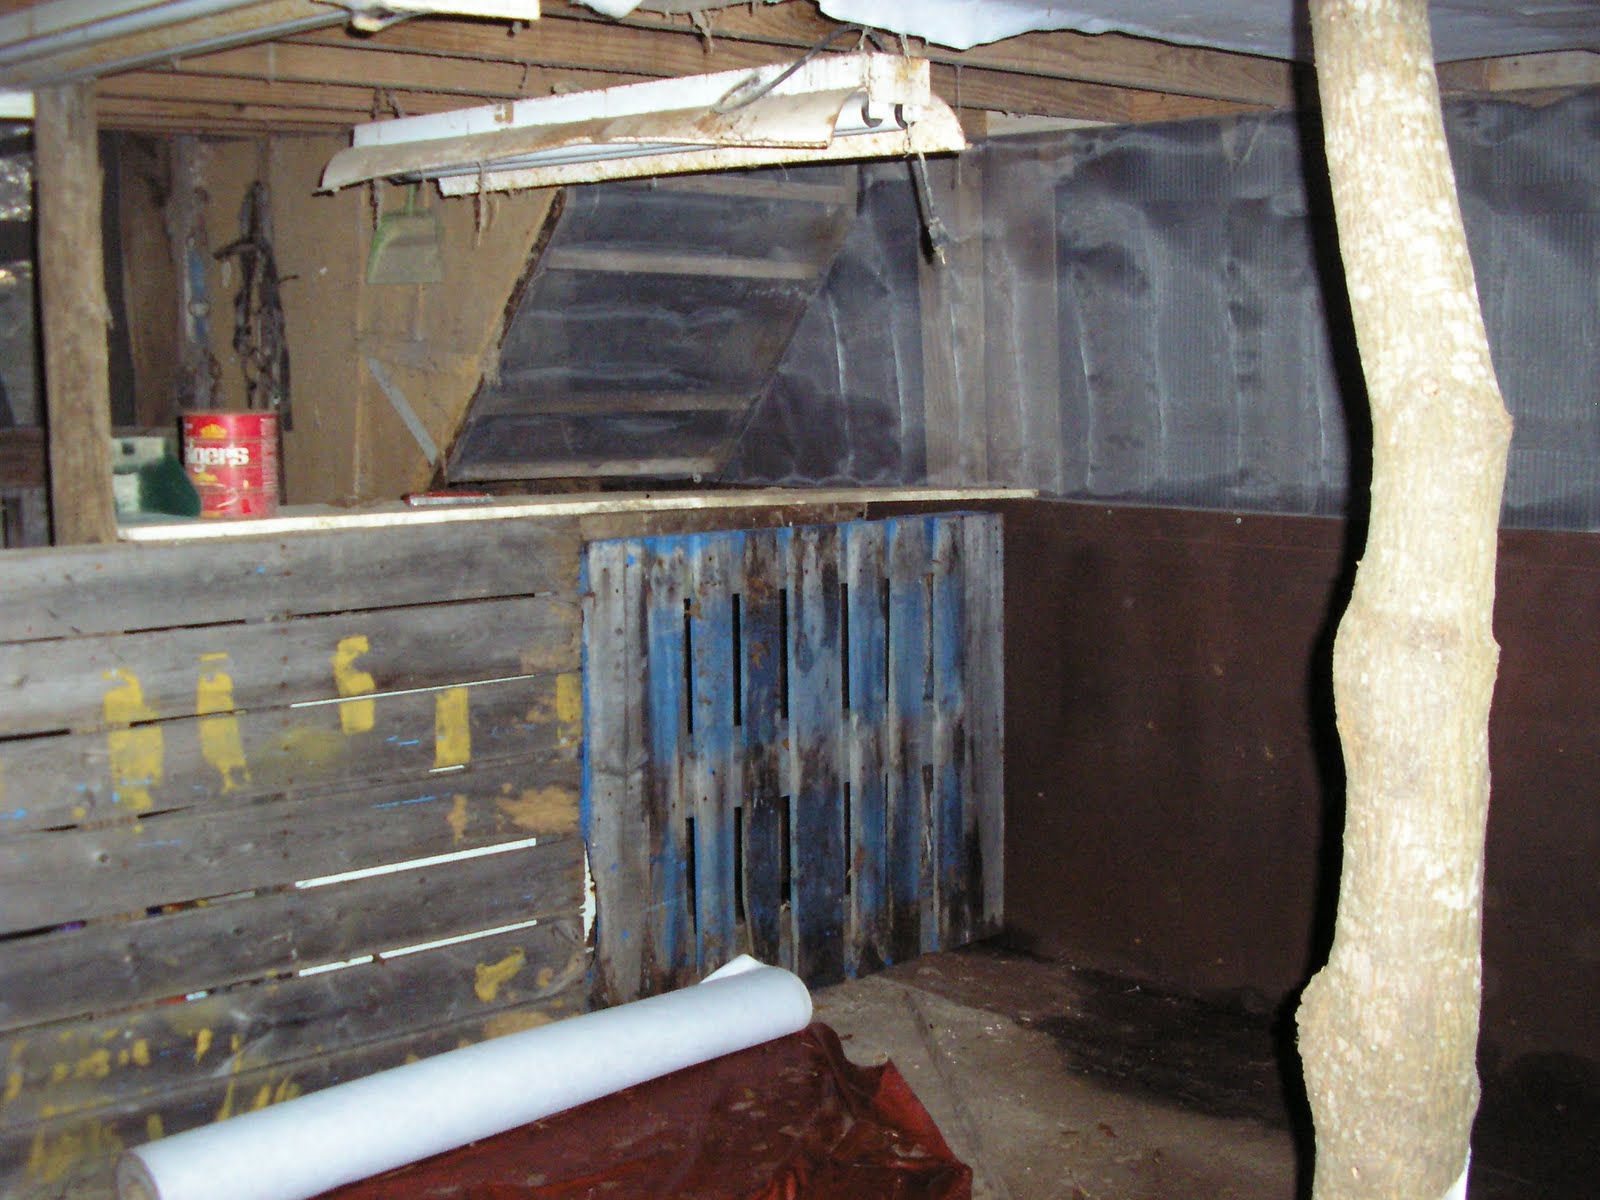
Well the first step in setting up the colony was to clean the space out. We burned off as much of the trash and debris as we could, but as you can see there was a good sized pile of stuff that will have to be hauled off.

Here is the small pile of potentially usable lumber than we got. It is mostly small pieces left from other projects so we will probably use it to build stuff for the rabbits.

Here is the small pile of stuff that might still be in usable shape. I will sort through this pile in a couple days and discard anything beyond repair. We did find some heavy duty pullies, a fence stretcher and a come along. Hope they are still in working shape once they are cleaned up. Sure would be nice to have.

This is the space all cleaned out of junk and the old nasty particle board off the walls. Sure did let in some light taking that stuff down. The space is about 14 ft. wide and 16 feet long. It will be a good sized space to set-up two colonies, a feed space and a couple cages for emergency purposes. The large hutch type cages that we are using now will make nice grow out cages for the weanlings.

Next step in a few days. Blessings, Kat
Friday, January 6, 2012
Rabbit Colony
Well, we have made the decision to move our rabbits into a colony or colonies type setting. We won't have an outside colony, but have decided to use the old feed room in the big horse barn. We have made this decision for several reasons. I have several rabbits that refuse to use a litter box and so their cages must be cleaned since they are wood bottomed regularly. All my cages are full and I either need to build or buy more cages which I have no where to put in the area that the rabbits currently are. The rabbits are not necessarily cooperating on cage breeding lately. So our first step was to clean out the old feed room which had been used as a storage area by the previous owner. Particle board had been put up on the walls, which was falling down and most of the stuff she had in there was rotten and destroyed by mice. We even found what we think was a possum skeleton behind a wooden box. We have spent years getting rid of the junk left on this farm by the previous owner. She never threw anything away and each of the pastures had a large mountain of scrap metal where she just dumped old tools, wire, roofing material etc. She kept saying she was coming to get stuff from the buildings so we were careful to keep it there. However, we need the space and there is so little left in that room that is useable or even recognizable. One large wooden crate had obviously been filled with stuff made of wood which had rotted into one large pile of sawdust. Of course the stuff had been in there since the 70s and there had been leaks in the roof for quite some time when we moved here, but what a mess. So we cleaned all that out yesterday and burned what we could and now have a couple loads to take to the dump and one very small pile of stuff that might be usable. Now we have a clean slate. Today I will measure the area and plan the layout for the colonies along with taking the junk to the dump. I will take some photos along the way to show our progress and how everything is set-up and built. There is so little on the net about indoor rabbit colonies that I thought a pictorial of the progress would really help others thinking about doing the same thing. The cages will be kept as grow-out cages for weaned litters and this way our colonies won't get too crowded and it will be easier to catch the rabbits for butchering. For the posts on our progression I will keep the same title just adding numbers behind it for ease of following. Blessings, Kat
Thursday, January 5, 2012
New Year's Soapmaking
Over the past year I have been reading a lot about soapmaking. I have discovered quite a bit and while I like my first soaps that I made in December 2010 I can do better. First I discovered SoapCalc. They have an awesome lye calculator in which you plug in your oils, how much you want it superfatted or not and it will tell you the amount of lye and water to use. It will also tell you the properties of your soap. Different oils have different properties that they bring to the soap...things like hardness, conditioning, etc. While all soap cleans some oils produce a soap that cleans better. So I have been changing and tweaking some of my recipes. Here is what I made yesterday:
Laundry Soap #1
16 oz. coconut oil
16 oz. vegetable shortening
12.16 oz. water
5.191 oz. lye
This has a 0% superfat since I am using it for laundry and dishes and need it to attract oil rather than give it. This produced a very hard bar with very high cleansing properties.
Laundry Soap #2
16. oz. coconut oil
17 oz. lard
10 oz. tallow
16.34 oz. water
6.758 oz. lye
This made a hard soap with high cleansing properties also. Properties aren't as high as the previous soap, but they are high enough. It also is 0% superfatted.
Bath Soap
10 oz. coconut oil
20 oz. lard
7 oz. olive oil
8 oz. tallow
17.1 oz. water
6.408 oz. lye
This soap was calculated to give a 5% superfat. It is a moderately hard bar with good cleansing properties as well as conditioning properties. It gives a good bubbly lather also.
Goat milk Soap
8 oz. coconut oil
1 oz. cocoa butter
18 oz.lard
10 oz. olive oil
5 oz. shortening
5 oz. tallow
15.96 oz. goat milk
5.896 oz. lye
This was also 5% superfatted. It gives more of a creamy lather than bubbly. It is a moderately hard bar with good cleansing properties and high conditioning properties. I really like this one for use on the face, but it will work well as a bath soap also.
Again I used the hot process so that my soap cures while it cooks. This means that my bars are ready to use when they are dry. The laundry soaps dry quickly, but the goat milk soap takes awhile. I have found that you need to cut your soaps while they are still slightly warm to the touch and they cut much easier than waiting until they are cool. You get better bars and fewer bars that fall apart. Save all those chips and soak them in hot water then when they gel you have a liquid soap. I highly recommend using soap calc. I really think I have much better soap because of using the lye calculator and it is fun to play around with different oils and what properties they will bring to your soap. Blessings, Kat
Wednesday, January 4, 2012
Rendering Lard
There are many uses for lard so it is handy to know how to render it. Rendering simply means that you are separating the pure fat from the meat and gristle. So I thought I would share how I render my lard.
Step 1. Trim as much meat as possible off the fat.
Step 2. Grind the fat. This doesn't have to be a fine grind, a coarse grind works just fine. If you don't have a grinder you can chop the fat into small bits and this will work also, it will take a bit longer though.

Step 3. Place the lard in a pot or crockpot with 1/4 cup of water and simmer. If you do this on a stove use a medium low setting and if you do this in the crockpot use a low setting. Then cook and cook and cook some more. Periodically you will need to stir the lard so that the cracklins don't burn. This process will take a few hours stove top and about 8 hours in a crockpot depending on the strength of the crockpot. Mine is an el cheapo crockpot so doesn't have a whole lot of kick with temperature. If you have a really nice one it's low setting might be a higher temp. In other words keep an eye on your lard whether using the stove or crockpot.

Step 4: Your cracklins (meat and gristle bits) will sink to the bottom as the fat is separated out. Then they will start to brown a little. At this stage turn off the heat and let them cool for about 10 minutes.
Step 5. Take a strainer and line it with cheese cloth. You can either freeze your lard in chunks or pour it into jars. If you want to freeze it then take a pyrex dish that is square and pour the lard through the strainer. Place the dish in the freezer for a couple hours then cut your lard into chunks to place in a ziploc bag. If you are pouring into a jar then you can let it cool for a bit then place a lid on the jar and store in a cool place. Lard will go rancid if stored in a hot area.
Step 6. Use your lard. Biscuits and pie crusts made with lard are by far the best. Use lard to saute or fry. If your hands are really dry consider rubbing a tiny amount of lard on them. Make soap. Grease your cookie sheets and baking pans.
That is it. It is really an easy process even though it does take some time. You can use this same process for any type of animal fat. Tallow is great for making candles (they smoke alot though) or making soap (makes a nice hard bar) or making a leather preservative lotion. Lard is softer than tallow so don't be surprised if it is really soft at room temperature. Mine stays creamy even in the refrigerator. Oh, and don't throw away those cracklins! Use them for cracklin bread or you can feed them to the chickens, dogs or cats if you really don't like cracklin bread. How can anyone not like cracklin bread?! Use them, they certainly don't belong in the garbage. Blessings, Kat
Tuesday, January 3, 2012
Economics of Raising a Hog
While we aren't necessarily concerned with raising hogs for economic reasons it sure helps to see either how well you did or how much in the red that meat put you. So here is the economic lowdown on how we did with the hogs. We will look at the cost and benefit of one hog.
First was the cost of the pig. This was a weaner pig and the cost was 40.00 plus about 10.00 in gas for the drive to pick it up. So 50.00 dollars total.
Second our fence was already in place as the pasture was designed to hold goats, so that was no special cost for us.
Third is the cost of feeding the pig. To start with we had loads of garden produce, goat milk, excess eggs, and kitchen scraps to feed with. I had a couple neighbors that garden and can and they would bring their gardening scraps and cleanings to feed the pigs. During the first several months this made up the majority of the diet of the pigs. They were also fed some oats, alfalfa pellets and black oil sunflower seeds. So from June until mid September it cost approximately 27.00 per pig to feed.
Then our eggs supply went down due to hens going into molt, the garden produce greatly slacked off and the goat milk amount went down. We had loads of pears and they would get a 5 gallon bucket of pears daily, but pears don't have protein. We started to see a slowdown in growth rate and decided that we needed to find a commercial source of protein other than the sunflower seeds as they are tremendously expensive. The pigs were getting to where they didn't eat much of the alfalfa and so increasing that would not do us any good. So about mid September we started adding commercial hog feed to their diet and they started gaining again. During the months of October, November and December their appetite greatly increased. They got pears into November and also as the acorn crop was tremendous they ate alot of those in their pasture and I processed 5-10 lbs. of acorns daily to supplement them and keep the commercial feed down. The last 2 1/2 to 3 months the cost for feed per pig was 64.00 per month.
That brings total feed cost per pig to 313.00.
Now what did we get for that money and did we come out ahead?
I will list what we got by cut or usable piece and then list what it would cost me retail for that piece or poundage. Prices were gathered from my local grocer on December 30th.
20 lbs. nitrate free bacon 5.49/pound or 109.8
5 lbs. sausage 3.50 per pound or 17.50
12 pkgs. of 6 boneless loin chops 6.35 per pkg or 76.20
2 tenderloins 14.00 a piece or 28.00
2 racks of spareribs 12.44 a rack or 24.88
2 racks of baby back ribs 16.69 a rack or 33.38
4 4lb. boston butts 12.78 each or 51.12
4 5 lb. picnics 14.00 each or 56.00
2 whole hams (country cured and smoked) 50.83 each or 101.66
4 lbs. hocks 2.19/lb. or 8.76
4 lbs. lard 3.00/lb. or 12.00
1 loin roast 2.99/pound or 8.97
18 dog bones like you would find at the pet store 4.00 each or 72.00
A week's worth of dog food (internal organs) 18.99
Things that I couldn't find prices on:
5 lbs. cracklins
4 trotters
So total cost to have purchased all this pork retail would have been 619.26 not including the cost of the trotters or cracklins. So total savings was 306.26. Now this is comparing to retail cost of typical commercially raised grocery store meat which is not really that comparable. To compare our hog with retail cost of pastured pork the savings doubles or triples. However, since ours were not completely organically fed even though pastured the entire time I stuck with typical grocery store retail prices. Pastured pork, however is typically double to triple that cost depending on where in the country you are. Still not a bad savings of just over 300.00 dollars per hog. I know what I have in my freezer is much healthier and much much more flavorful than what can be purchased in the grocery store. Must have been all those acorns and pears!
Was it worth it? Absolutely! Will we do it again? You bet! Blessings, Kat
Monday, January 2, 2012
Hog Slaughtering***WARNING GRAPHIC***
***WARNING...This post is graphic in nature. If you don't want to see the slaughter process of a hog please skip this post. Slaughtering is a way of life to many families and has been for many generations. Negative and derogatory comments will be deleated. This is an informational post for those seeking to further their education.****
Just in case for those that are reading the warning we will start with a picture of the pig. She was a hampshire/yorkshire cross.

Now onto the process.
She was shot with a 22 rifle aiming for the center mark of her head. Mentally you draw an x..right ear to left eye and left ear to right eye. After she is down from the shot then she is bled by inserting a sharp knife just above the sternum angling down toward the heart. A sideways twist of the knife will sever the main arteries leaving the heart and she will bleed out quickly. You don't want to stick the heart because you want it to help pump the blood out. You don't have very long before her heart stops so this must be done quickly after the shot. My husband likes to pump the front leg to help bleed out the animal quickly.
Next she was moved to the scalding tub which was 150 degrees in temperature. We chose for this hog to scald and skin simply because we didn't want the skin on this one and we had discovered by accident previously that scalding makes the skin peel right off...like peeling an orange.

The next step was to place her on a ladder on her back and remove the head. This keeps any little blood left from setting up in her neck. I will explain why we laid her on the ladder vs. hanging her.

The next step was to skin her. The guys started around her legs with sharp knives and once that got going then her skin just peeled off by hand. In this photo you can see the large flap of belly skin laying on the ladder right beside her. The skin is finished being peeled away once they lift her to hang her, but for right now it doesn't get in the way.

Then the tail was removed.

Then you need to tie off the bowel and the best way to start this is from the outside. Keeping your knife blade angled slightly away from the bowel you hold the outside edges, then insert knife parallel to the bowel, cutting the membranes that hold it in place so that you can pull it out enough to tie it off. This is a two person job, one to hold and cut the bowel and the other to tie it off tight. You don't want any spillage in your gut cavity.

Next is to start opening up for de-boweling. Now here is why we have the hog on the ladder. Gravity works in our favor by pulling the organs down toward her backbone and so we can easily (relatively) get her opened up without internal organs flopping in our way before we are ready to pull them out. We start at the chest cavity, cutting through the sternum and opening up the diaphragm. You can use a bone saw for the sternum or a pair of loppers, both work well.

The next step is to start cutting down into the belly to open the gut cavity. We didn't cut the final membrane until we had her hanging over the wheelbarrow. This is where you need to be careful and hold the membrane away from the intestines as much as possible to try and keep your knife from opening the intestines.

Opening up the whole cavity from tail to neck.

Removing the internal organs. We had a wheelbarrow underneath her to catch everything. Mostly, the internal organs can be coaxed out with your hands working on the membranes that hold them in place, but sometimes you might need to carefully cut some of the membranes to get them loose. There are a few spots that they can be a bit stubborn. Start at the tail and work them loose so that the buts fall out first then you can bring the chest organs out last.

The last step is to cut the hog in half to let some of the heat out of the meat quicker. Since the weather was too warm she was cut down further into primal cuts and placed in coolers on ice and the next day we processed her and got her in the freezer. To cut her in half and get a good cut on both sides, I recommend starting with a knife and go right down the center of her back all the way to her spine. Then use that as your guide for your bone saw or saws-all. This way you don't get an off center cut.

That's it folks. I do have a few recommendations. A saws-all is a wonderful tool to have if you plan on doing a good amount of butchering. Have one that is just for that....no other uses. Wood blades work well and don't scatter a whole bunch of bone. Choose weather in which it is cold and gonna be cold overnight...30 to 40 degrees for the highs. However, weather was not cooperating for us so coolers and the refrigerator had to suffice. You will have to turn your refrigerator down colder and I recommend using a thermometer to monitor your temps. Have the refrigerator set before putting the meat in there so the temperature doesn't rise too much. If you are using your refrigerator then make sure it is empty. Even with mine empty, I had to use two coolers and the little refrigerator for one of the hams. Temperature is very very important and that meat has to be cooled down quickly. One more thing, be prepared to wash your hog and wash your hog throughout the process. We crubbed and rinse her before she went into the scalding tub, while she was in the tub and then again before splitting her into halves. Hogs are dirtier than you think they are and we try to keep the process as clean as possible. Of course during processing the meat is further washed and cleaned out because hairs are everywhere. This is where scraping is a definite benefit.
We now have two hogs in the freezer which will last us til next butchering season. It is a lot of work to get all that meat put away and processed, but well worth the effort in knowing that we will eat well for the next year. Blessings, Kat
Subscribe to:
Posts (Atom)